
My first-generation HomePod had developed the fault that everyone in the repair world calls the death fart. You turn it on, it makes a wet, crackling noise that sounds exactly like you would expect, and then it either cuts out or just keeps going. Apple stopped selling these years ago, so buying a replacement meant paying used prices for a speaker that might already be on the same path.
It turns out the cause is well known. A handful of tiny ceramic capacitors near the subwoofer connector go bad, and replacing them brings the speaker back. I had never done micro soldering in my life. This is how it went.
The part that scared me
Before I touched anything I watched a pile of repair videos. Two videos from the Nic’s Fix channel did most of the work for me: one on taking the HomePod apart and one on the capacitor fix itself. Watching other people lift a capacitor off a board with a hot air gun makes it look boring, which is exactly the effect I needed.
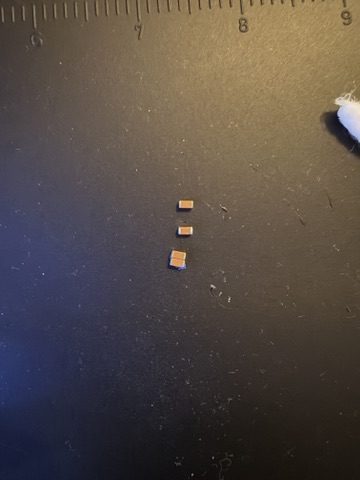
The thing that surprised me was the size. I had pictured the usual barrel-shaped capacitors with legs. These are flat 1206 ceramic chips, about the size of a grain of rice, and they are held on by solder pads you can barely see. I only worked that out when I photographed the first one I removed. If you are following along, check what is actually on your board before you order parts.
What I used
- A WEP 882D station with an iron and hot air in one unit. A certified station would have cost more than the repair saves, so I went with the cheaper one and was careful with it. I never left it running unattended and kept it on a heat-safe mat.
- Four replacement capacitors, 1206 size, 10µF, X7R, rated for at least 16V.
- Flux, solder wick, 99% isopropyl alcohol and a pair of tweezers.
- Kapton tape to hold the corners of the board down, because hot air will push a light board around.
- A phone, to photograph every cap and its position before it came off. This is the single most useful habit in the whole job.
Taking the old ones off
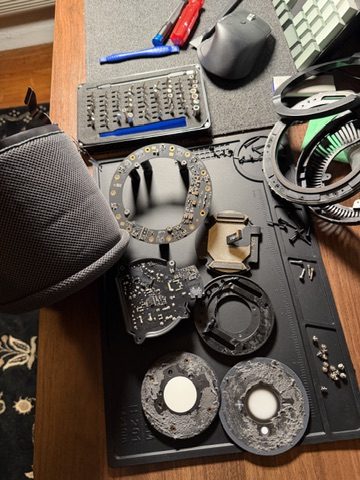
I had to pry the HomePod open first, which means working through the glued mesh without tearing it. After that, the old capacitors came off with hot air and tweezers. When the first one lifted clean, I felt invincible, which is about the most dangerous feeling you can have around a soldering iron.
I photographed the empty pads, cleaned them with wick and flux, and wiped the area with isopropyl alcohol before putting anything back.
Putting the new ones on
Soldering the new ones down was harder than the removal, and the nerves came right back. Ceramic chips crack if you heat them too long or too hard, and the pads can lift. So I kept each joint short and moved on.
Once the first two of the four were seated firmly, something clicked. The other two went down fine. When I was done they were sitting roughly parallel with no visible bridges between the pads.
The first power-up
This is the part I took seriously. There is mains voltage in a HomePod, and I had just worked on its board. I assembled it only as far as I needed to test it, kept the power supply area covered, plugged it into a GFCI outlet, and had my partner stand by holding a fire extinguisher.
Nothing smoked. Nothing smelled. I got the Apple “duh dunnnnn” startup chime straight away, and I knew it worked before I had even put my tools down.
I then played music at a few different volumes, since a fault like this can hide at low volume, and let it warm up for a while before closing the case.
Where it lives now
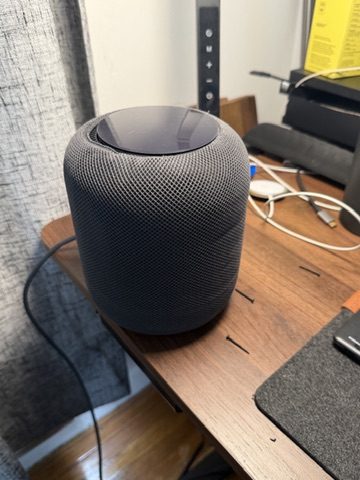
It sits on our dining room table and plays chill jazz while we eat dinners I cooked. That is a much better job than being e-waste.
What it cost
The soldering and hot air station was $55, and it was the biggest purchase by far. I already had the repair mat, a screwdriver set and the other basic tools, so I did not need to buy those. The capacitors came in a pack of ten for about $30 with shipping. I only needed four, so I have spares. The flux and solder wick came with the station’s solder kit, and I already had the isopropyl alcohol. That puts the total at about $85.
A new HomePod is $300 right now, and that is the newer model, not the first generation I was fixing. Even counting the station, I came in at well under a third of that. The station is also a one-time cost. I will use it again, and I have already started looking at what else I own that is broken.
What I would tell you before you start
Photograph everything before you remove it. Check the part size on your own board before ordering anything. Tape the board down. Do not rush the first joint, and do not skip the test with a fire extinguisher nearby just because it feels dramatic.
Mostly, though, I found a new hobby. I did not expect that, and I am already looking at what else I have in a drawer that needs saving.